
Photo by Rajiv Perera on Unsplash
Implement Infracost in your Azure DevOps build pipeline
Learn how you can enhance your CI/CD with useful cost information
Did you ever wonder how you can see the costs of your infrastructure right in your pipeline or maybe even before you deploy? By saying this I do not only mean that you know what you deploy and that you calculated everything before. I mean what if you have a mechanism as a developer to make sure that the infrastructure you coded really generates the costs you calculated. The solution is: infracost It shows you your cloud costs in your CI/CD pipeline.
What I want to show you in this article is how you can create a basic setup for your pipeline in Azure DevOps. There are a lot of other ways to use this tool but lets start with a basic one:
Prerequisites:
You need to have an Azure DevOps organisation and a project inside. Further you must have the proper rights to enable an extension for the organisation (or at least you have to know the administrator 😉)
Step 1 - Activate the Azure DevOps extension
Navigate to https://marketplace.visualstudio.com/items?itemName=Infracost.infracost-tasks and activate the Infracost Tasks extension.
Step 2 - Create an API Key
If you are running macOS you can use brew to install the CLI Tool.
First run brew install infracost and then run infracost --version. It should show version 0.10.11.
Now run infracost auth login. Your browser should open up and you should see a screen like this.
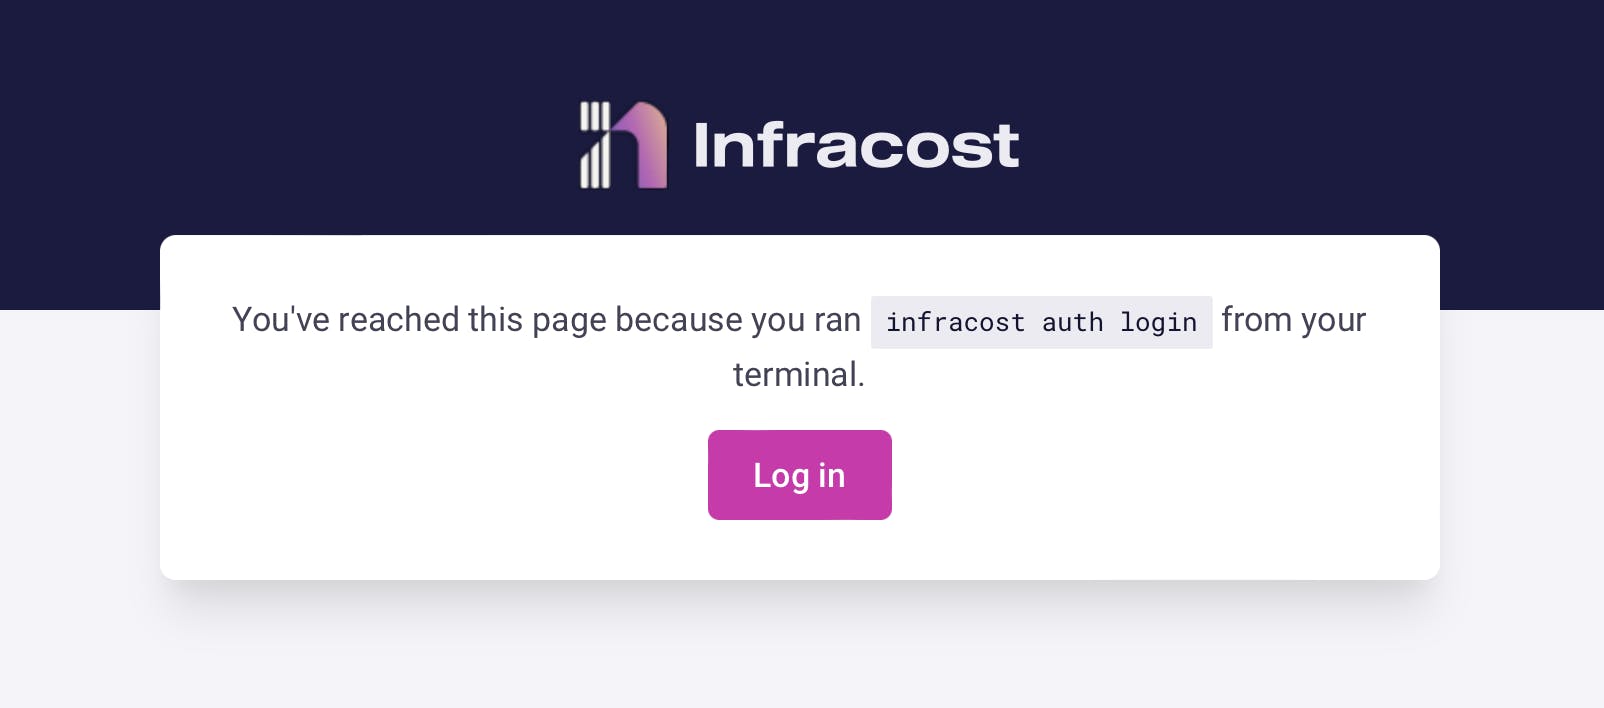
Now it is time to set up an account. You can either use your email address but also your existing GitHub Account. It is up to you. Once your account is set up go back to your terminal and run infracost configure get api_key and you should finally get your API Key.
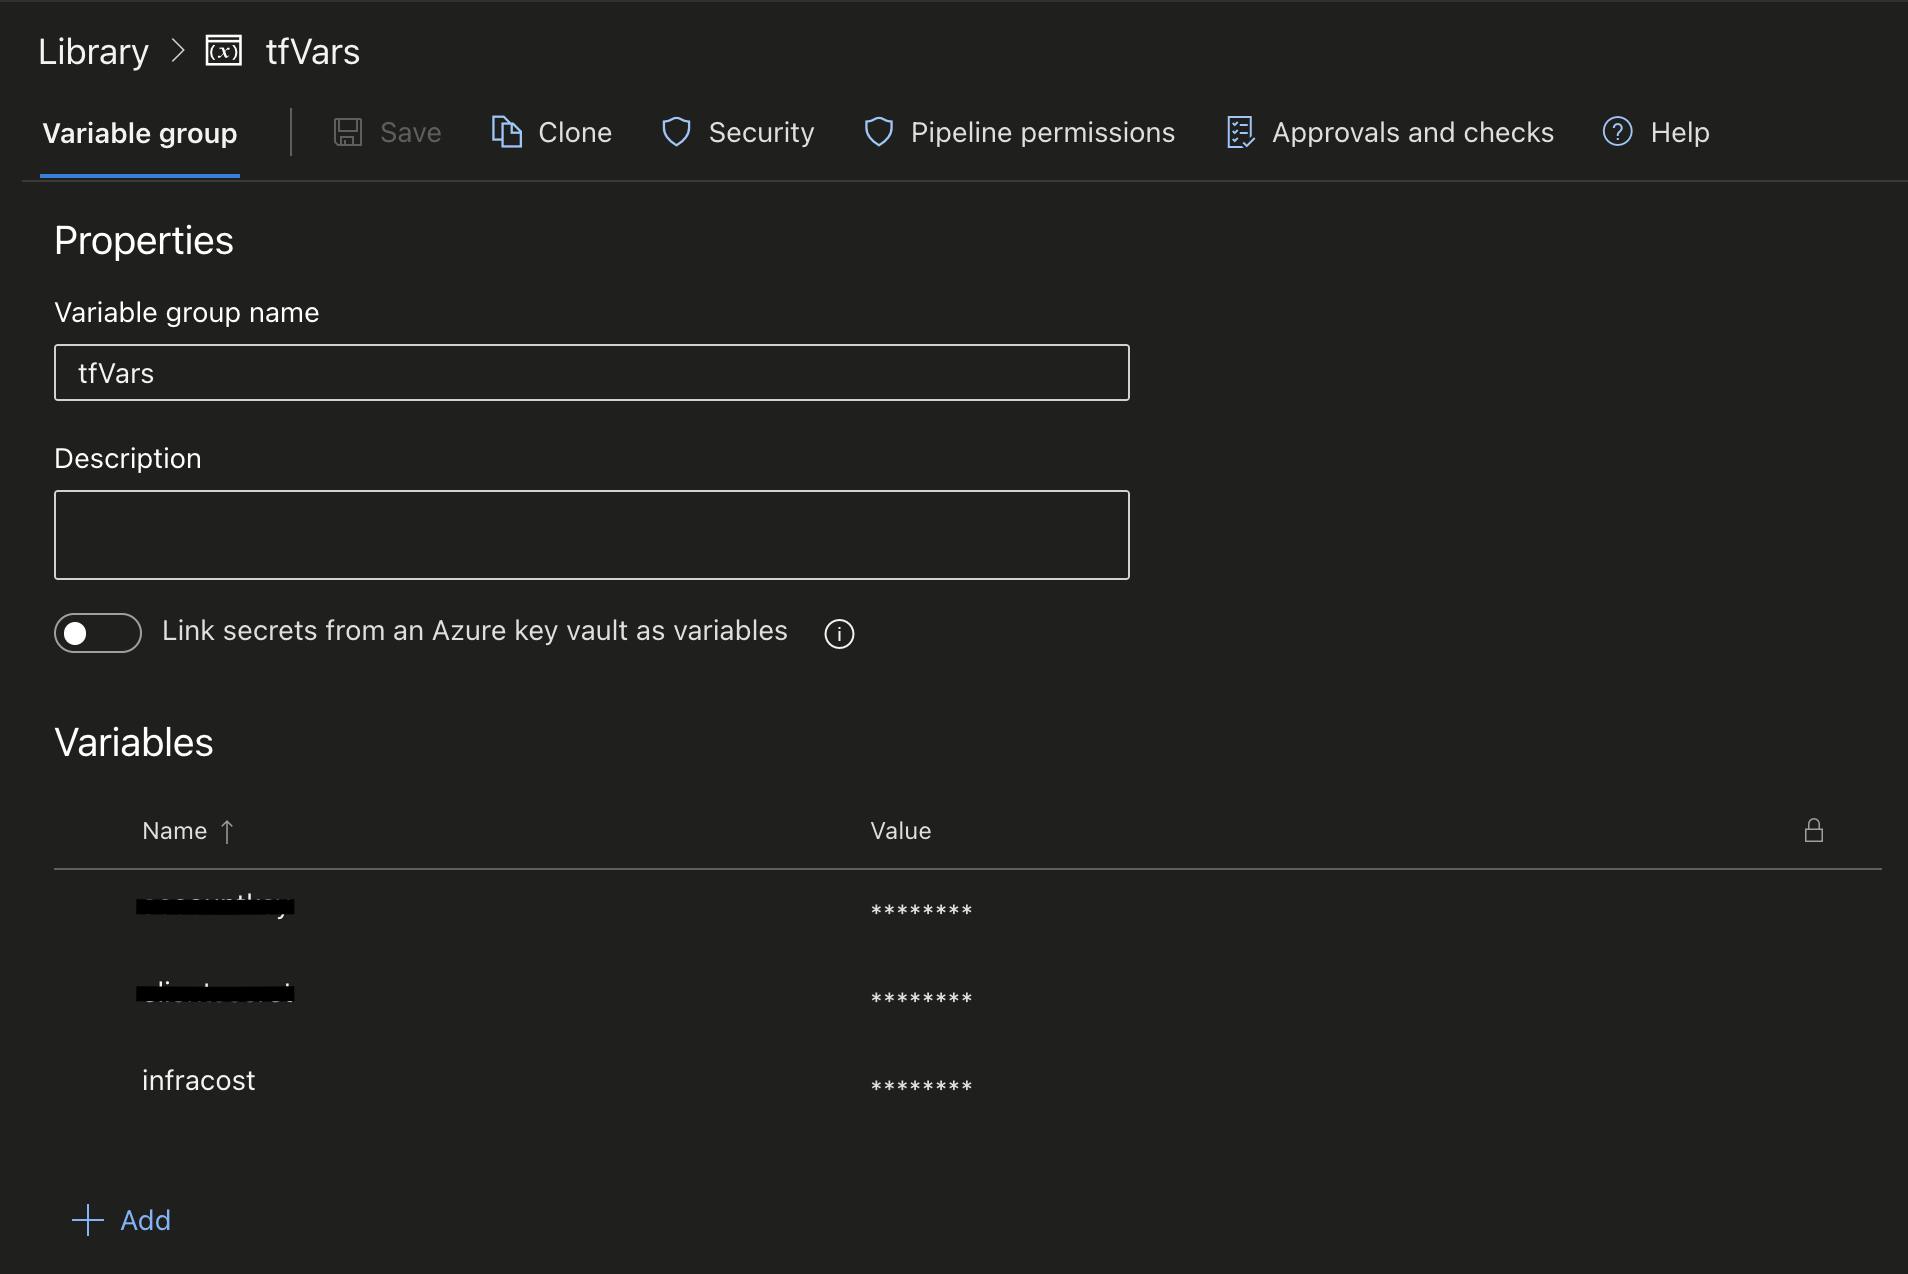
Store the key in a variable group in your Azure DevOps project and name it infracost. It should look like this.
Step 3 - Code base
Set up your code infrastructure that you have at least one resource which will be deployed. For example a linux virtual machine. Your code base could look like this:
providers.tf
terraform {
  required_version = ">=0.12"

  required_providers {
    azurerm = {
      source  = "hashicorp/azurerm"
      version = "~>2.0"
    }
    random = {
      source  = "hashicorp/random"
      version = "~>3.0"
    }
    tls = {
      source = "hashicorp/tls"
      version = "~>4.0"
    }
  }
}

provider "azurerm" {
  features {}
}
main.tf
resource "random_pet" "rg_name" {
  prefix = var.resource_group_name_prefix
}

resource "azurerm_resource_group" "rg" {
  location = var.resource_group_location
  name     = random_pet.rg_name.id
}

# Create virtual network
resource "azurerm_virtual_network" "my_terraform_network" {
  name                = "myVnet"
  address_space       = ["10.0.0.0/16"]
  location            = azurerm_resource_group.rg.location
  resource_group_name = azurerm_resource_group.rg.name
}

# Create subnet
resource "azurerm_subnet" "my_terraform_subnet" {
  name                 = "mySubnet"
  resource_group_name  = azurerm_resource_group.rg.name
  virtual_network_name = azurerm_virtual_network.my_terraform_network.name
  address_prefixes     = ["10.0.1.0/24"]
}

# Create public IPs
resource "azurerm_public_ip" "my_terraform_public_ip" {
  name                = "myPublicIP"
  location            = azurerm_resource_group.rg.location
  resource_group_name = azurerm_resource_group.rg.name
  allocation_method   = "Dynamic"
}

# Create Network Security Group and rule
resource "azurerm_network_security_group" "my_terraform_nsg" {
  name                = "myNetworkSecurityGroup"
  location            = azurerm_resource_group.rg.location
  resource_group_name = azurerm_resource_group.rg.name

  security_rule {
    name                       = "SSH"
    priority                   = 1001
    direction                  = "Inbound"
    access                     = "Allow"
    protocol                   = "Tcp"
    source_port_range          = "*"
    destination_port_range     = "22"
    source_address_prefix      = "*"
    destination_address_prefix = "*"
  }
}

# Create network interface
resource "azurerm_network_interface" "my_terraform_nic" {
  name                = "myNIC"
  location            = azurerm_resource_group.rg.location
  resource_group_name = azurerm_resource_group.rg.name

  ip_configuration {
    name                          = "my_nic_configuration"
    subnet_id                     = azurerm_subnet.my_terraform_subnet.id
    private_ip_address_allocation = "Dynamic"
    public_ip_address_id          = azurerm_public_ip.my_terraform_public_ip.id
  }
}

# Connect the security group to the network interface
resource "azurerm_network_interface_security_group_association" "example" {
  network_interface_id      = azurerm_network_interface.my_terraform_nic.id
  network_security_group_id = azurerm_network_security_group.my_terraform_nsg.id
}

# Generate random text for a unique storage account name
resource "random_id" "random_id" {
  keepers = {
    # Generate a new ID only when a new resource group is defined
    resource_group = azurerm_resource_group.rg.name
  }

  byte_length = 8
}

# Create storage account for boot diagnostics
resource "azurerm_storage_account" "my_storage_account" {
  name                     = "diag${random_id.random_id.hex}"
  location                 = azurerm_resource_group.rg.location
  resource_group_name      = azurerm_resource_group.rg.name
  account_tier             = "Standard"
  account_replication_type = "LRS"
}

# Create (and display) an SSH key
resource "tls_private_key" "example_ssh" {
  algorithm = "RSA"
  rsa_bits  = 4096
}

# Create virtual machine
resource "azurerm_linux_virtual_machine" "my_terraform_vm" {
  name                  = "myVM"
  location              = azurerm_resource_group.rg.location
  resource_group_name   = azurerm_resource_group.rg.name
  network_interface_ids = [azurerm_network_interface.my_terraform_nic.id]
  size                  = "Standard_DS1_v2"

  os_disk {
    name                 = "myOsDisk"
    caching              = "ReadWrite"
    storage_account_type = "Premium_LRS"
  }

  source_image_reference {
    publisher = "Canonical"
    offer     = "UbuntuServer"
    sku       = "18.04-LTS"
    version   = "latest"
  }

  computer_name                   = "myvm"
  admin_username                  = "azureuser"
  disable_password_authentication = true

  admin_ssh_key {
    username   = "azureuser"
    public_key = tls_private_key.example_ssh.public_key_openssh
  }

  boot_diagnostics {
    storage_account_uri = azurerm_storage_account.my_storage_account.primary_blob_endpoint
  }
}
variables.tf
variable "resource_group_location" {
  default     = "eastus"
  description = "Location of the resource group."
}

variable "resource_group_name_prefix" {
  default     = "rg"
  description = "Prefix of the resource group name that's combined with a random ID so name is unique in your Azure subscription."
}
outputs.tf
output "resource_group_name" {
  value = azurerm_resource_group.rg.name
}

output "public_ip_address" {
  value = azurerm_linux_virtual_machine.my_terraform_vm.public_ip_address
}

output "tls_private_key" {
  value     = tls_private_key.example_ssh.private_key_pem
  sensitive = true
}
Step 4 - Build pipeline
Now you can create your basic build pipeline based on yaml.
azure-pipelines.yml
trigger: none

pool:
  vmImage: ubuntu-latest

variables:
- group: tfVars

stages:
  - stage: Infracost
    jobs:
    - job: Analysis
      steps:
      - task: InfracostSetup@1
        displayName: 'Infracost : Install'
        inputs:
          apiKey: '$(infracost)'
          version: '0.10.x'
          currency: 'EUR'

      - task: Bash@3
        displayName: 'Infracost : Analysis'
        inputs:
          targetType: 'inline'
          script: |
            infracost breakdown --path .
You will have two tasks. The first task is to set up the connection and the second one is to execute the actual cost analysis.
Step 5 - Run the pipeline
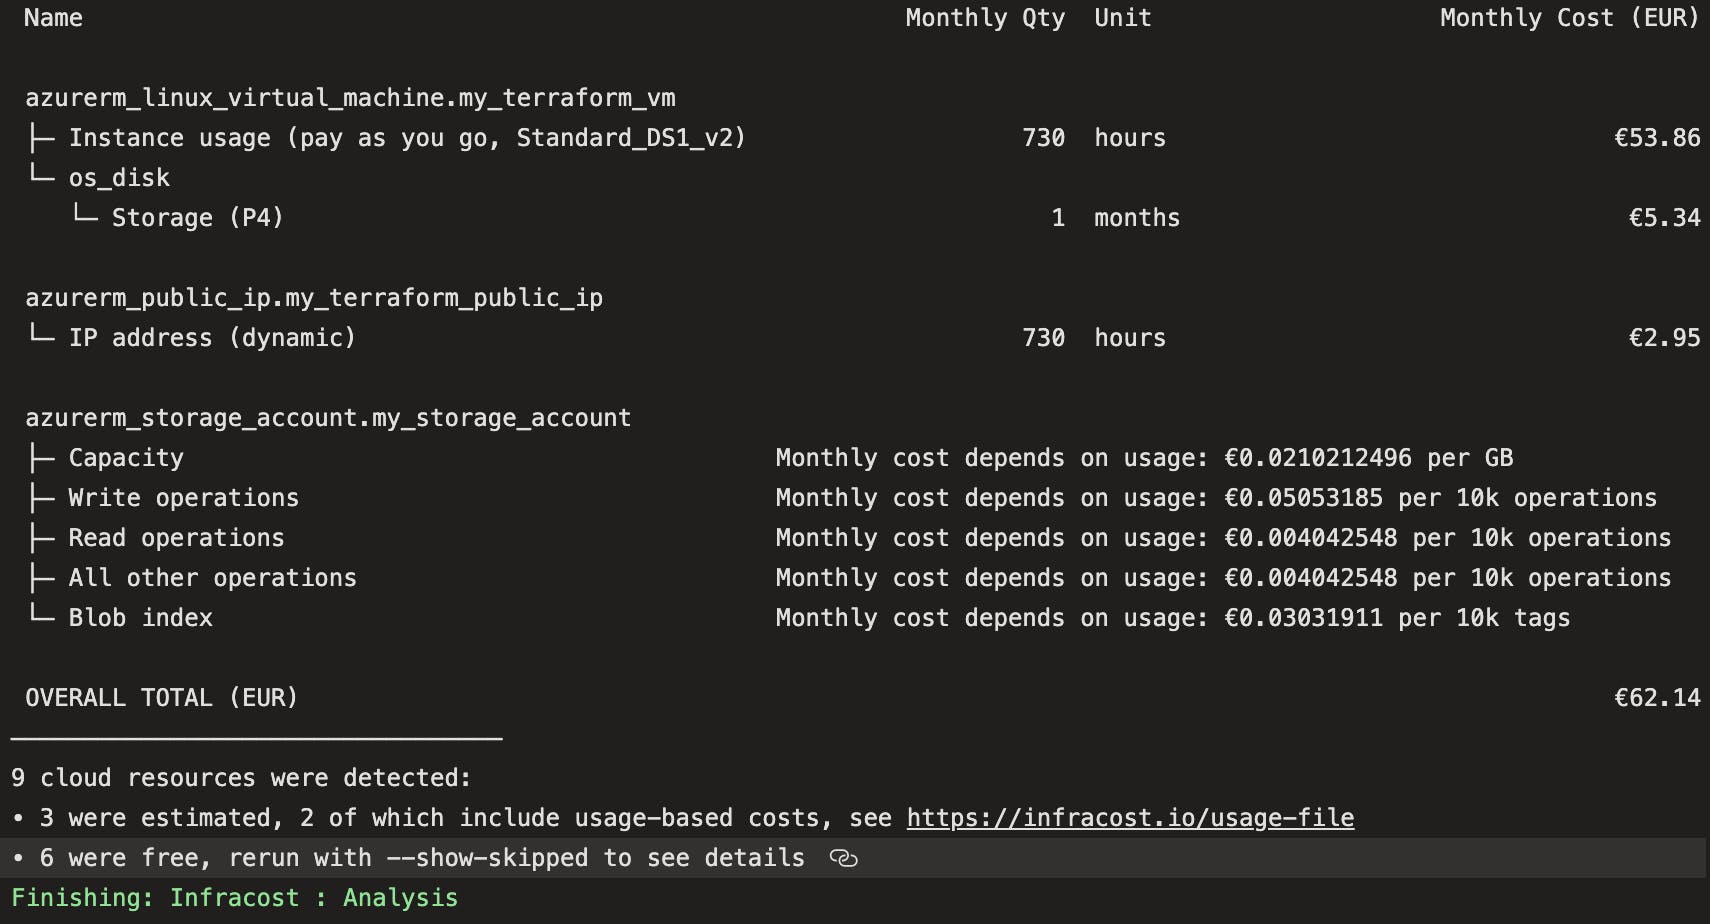
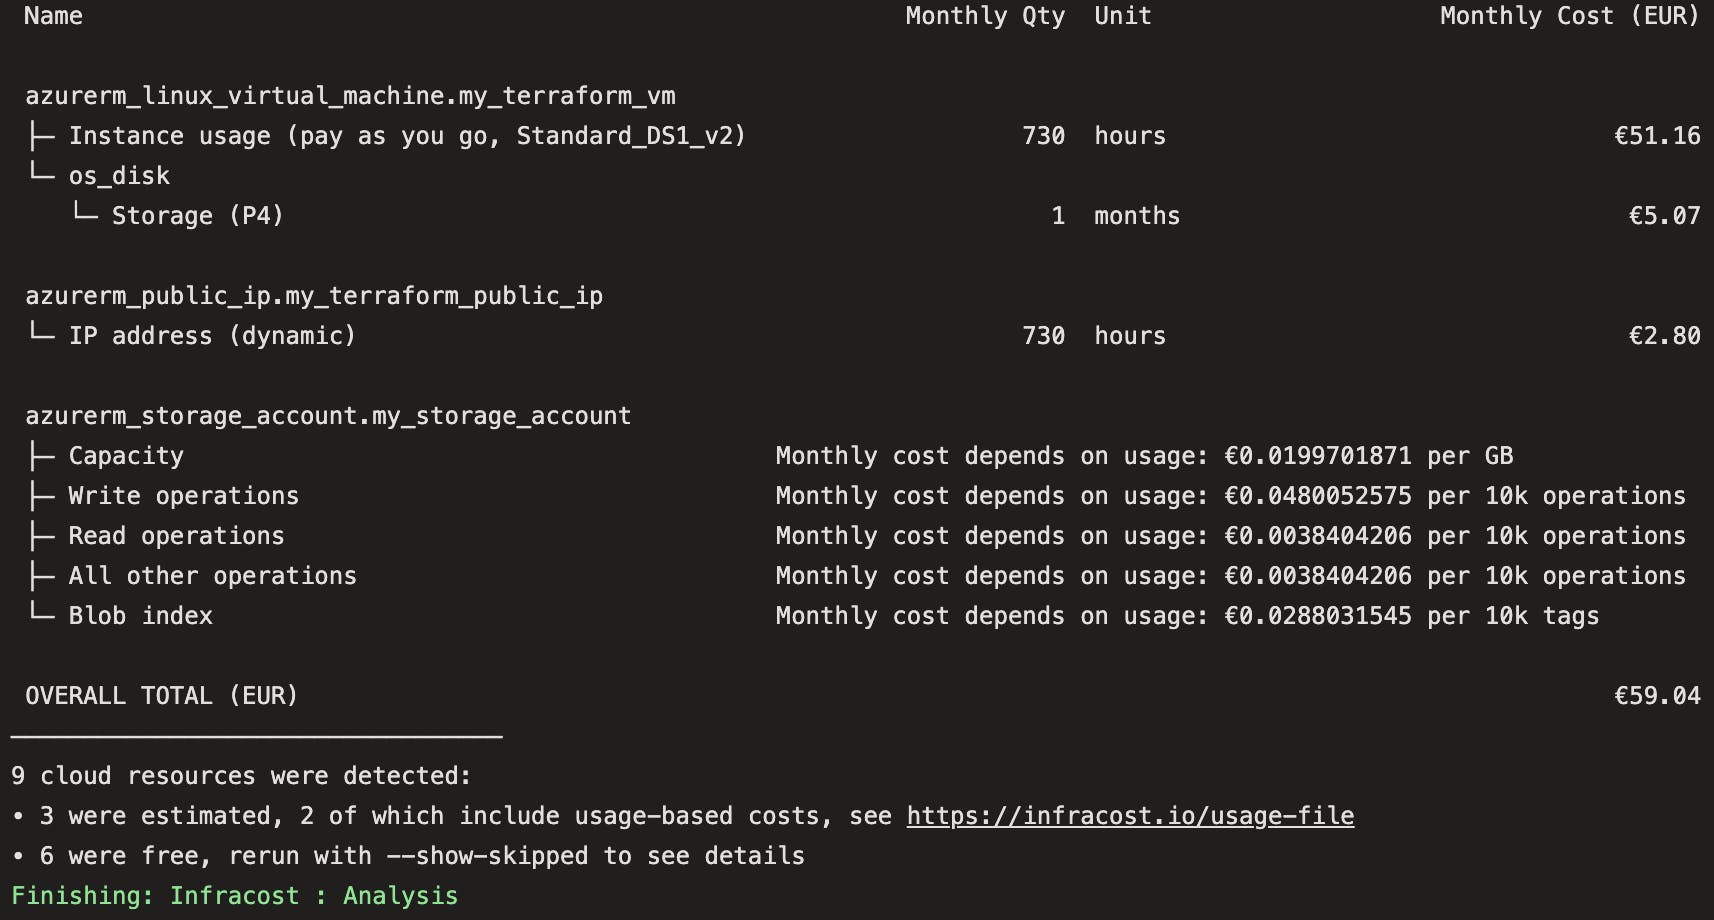
Now if you run your pipeline you will see an output like this, isn't that great?!
Extra Hint
If you have an EA with Microsoft for example and you get a special discount based on your contract, you can simply set the discount in your infracost account. For that navigate to "Org Settings" and then go to "Custom price books".
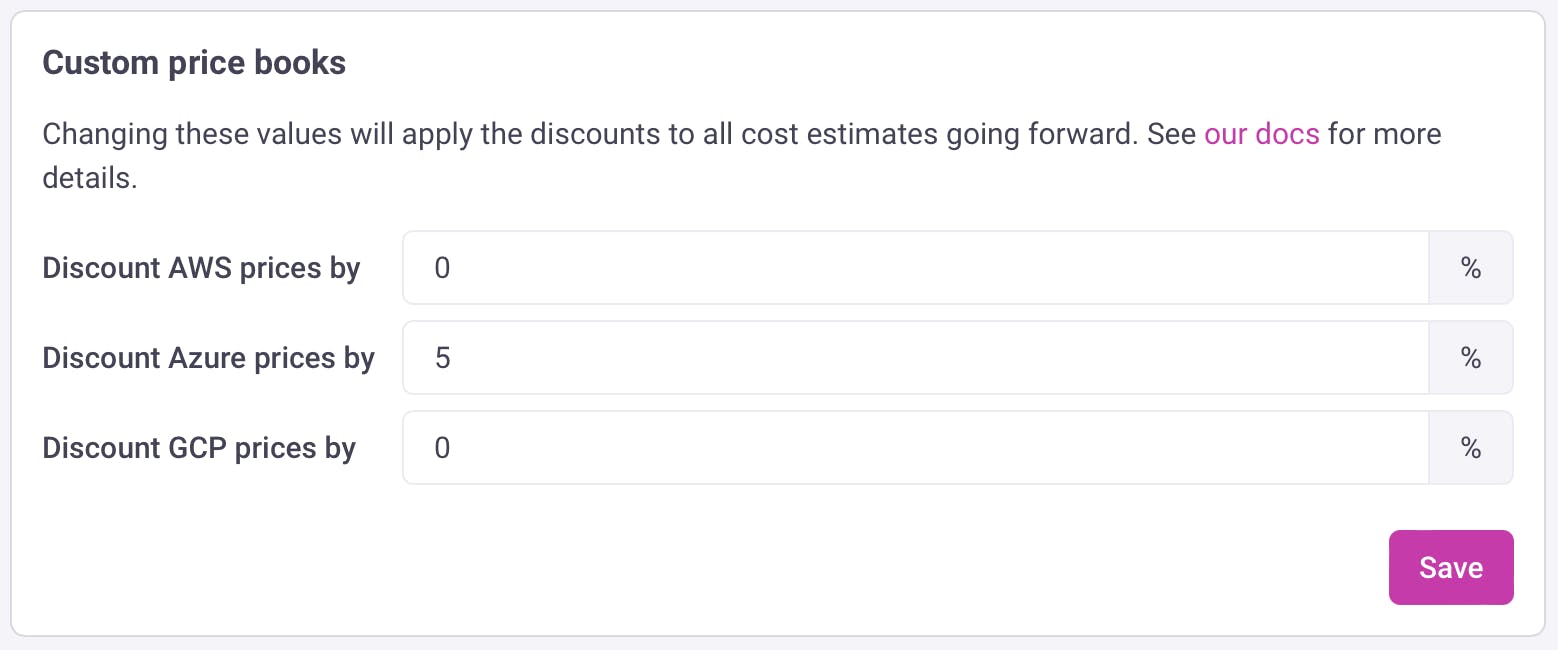
The costs will change a bit if you rerun the pipeline.
Thanks for reading! I hope you liked it.
